 Historically in real estate, spring and summer were the best months to buy a house, with many sellers waiting until then to list their houses. Buyers used the long days to drive from one neighborhood to another on the house hunt, and families needed to settle into their new homes before school got underway.
But in today’s market, all that has changed. The low inventory of homes for sale in the Puget Sound region, coupled with Internet marketing has motivated sellers to list year-round, knowing that buyers can virtually tour homes and neighborhoods via software and apps. Those apps also connect buyers to social networks and neighborhood groups in advance of a move, aiding families in the transition to new schools and communities any time of year. This is a great time of year to be a buyer. You can read the rest of this article Cathy wrote for our broker Jennie Wetter at Infinity Real Estate.
1 Comment
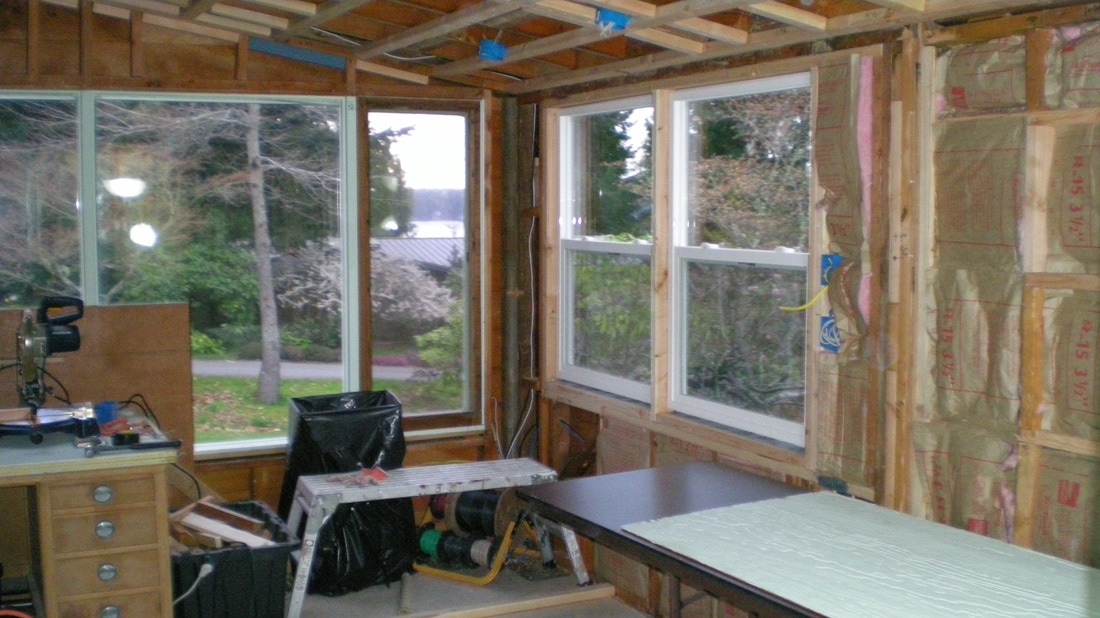
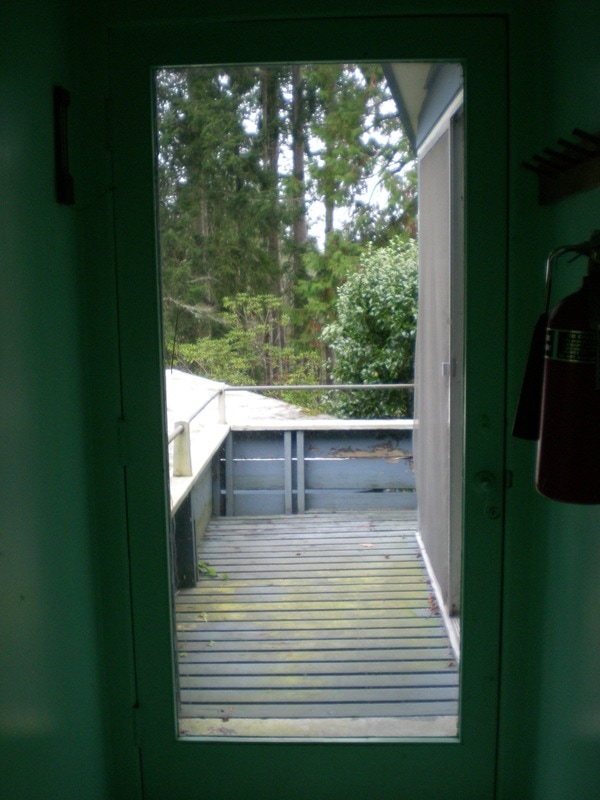
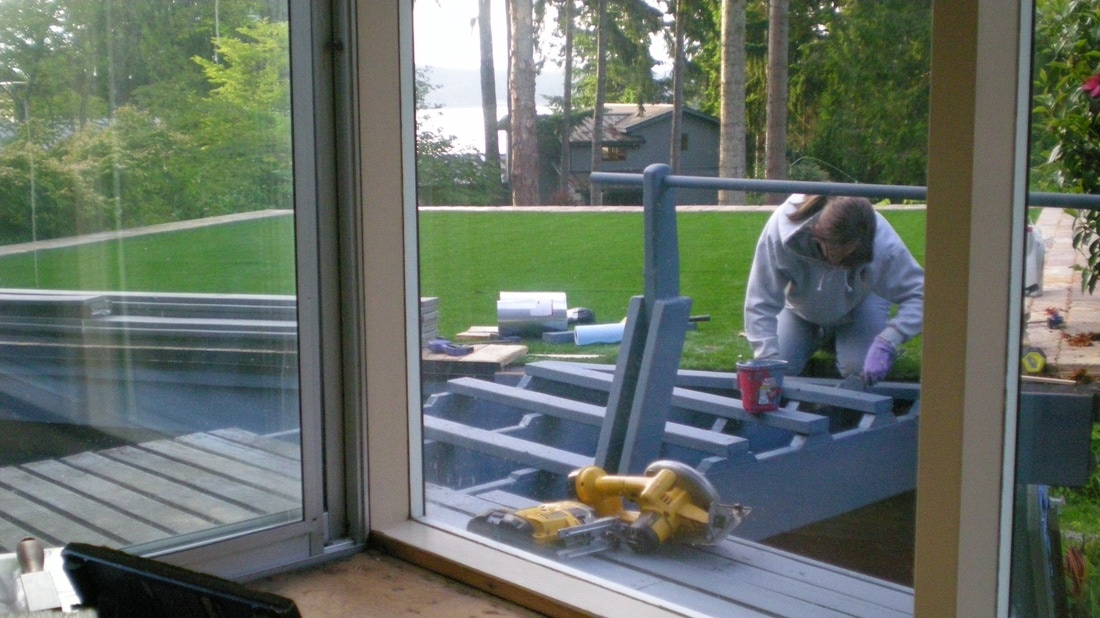
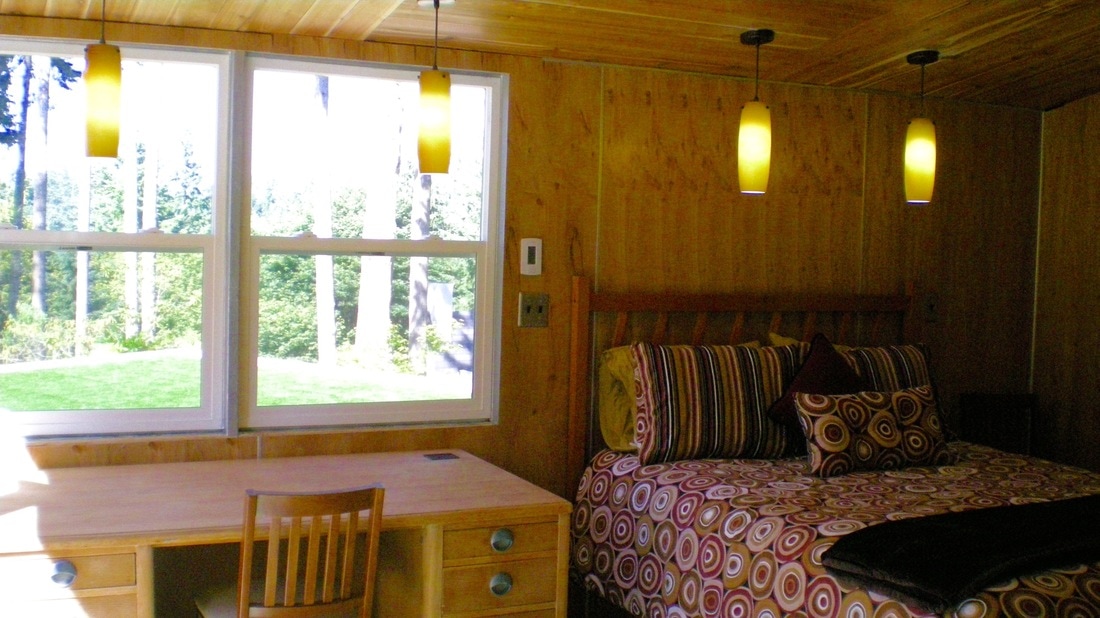
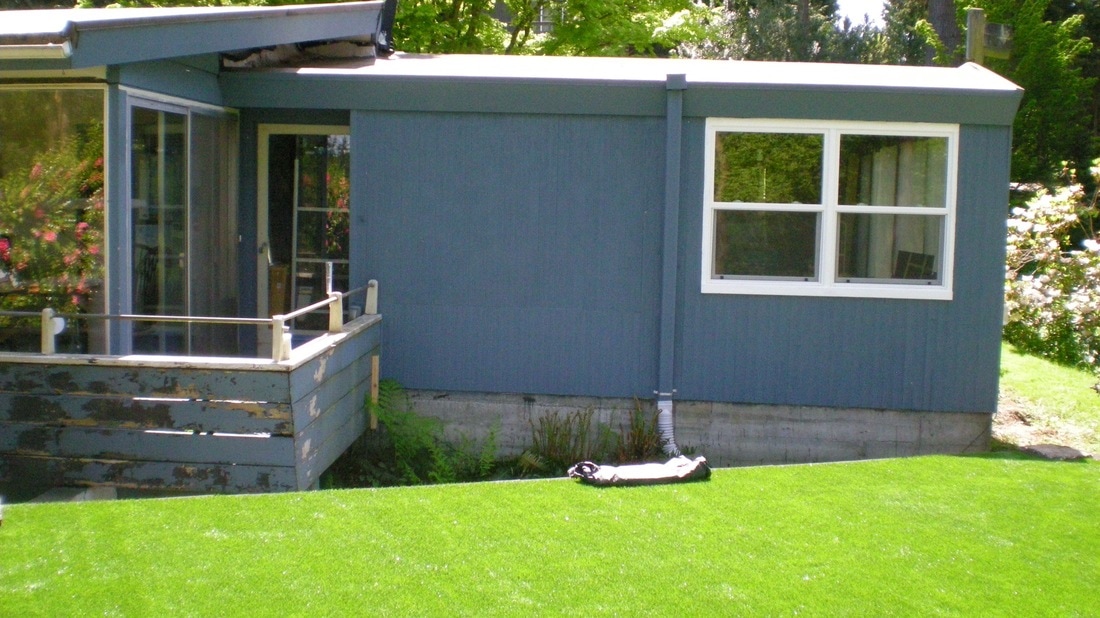
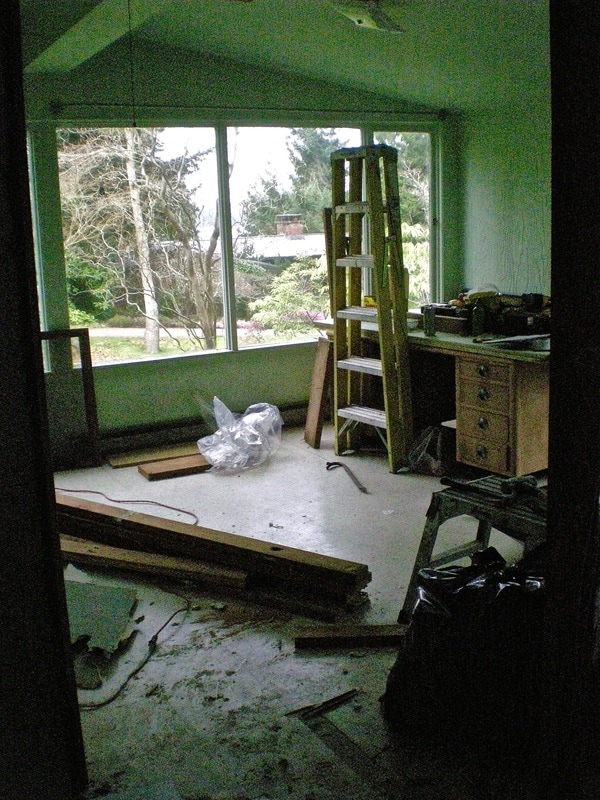
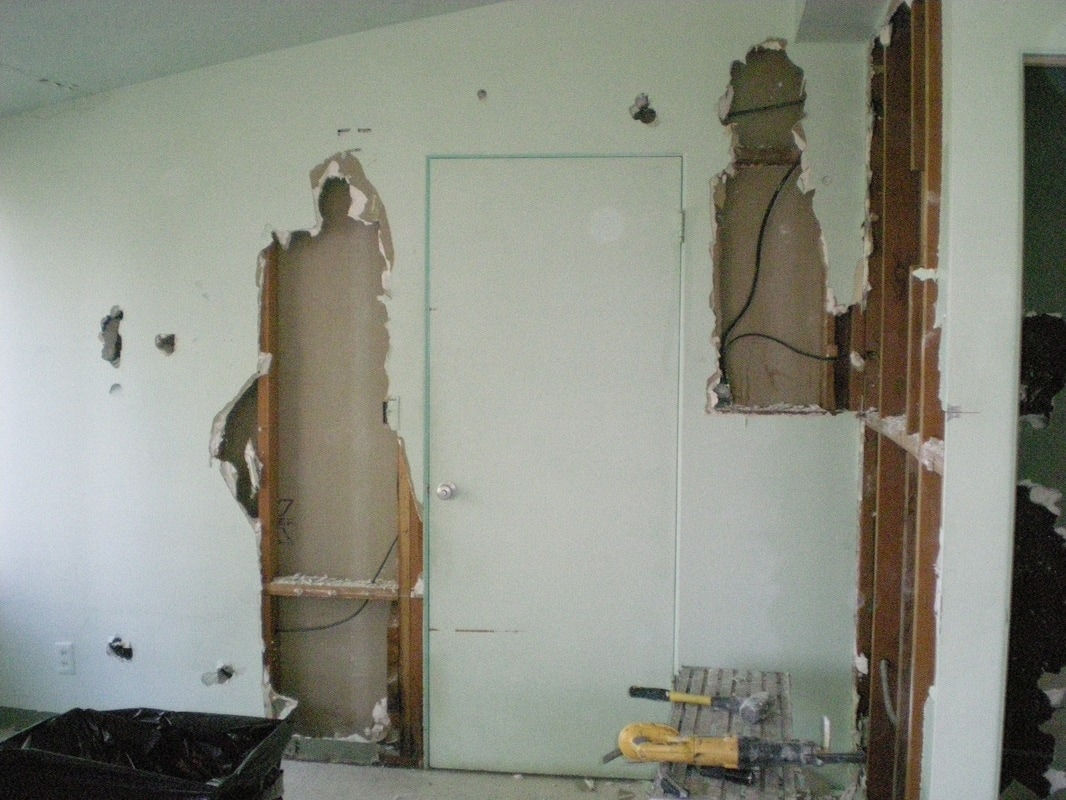
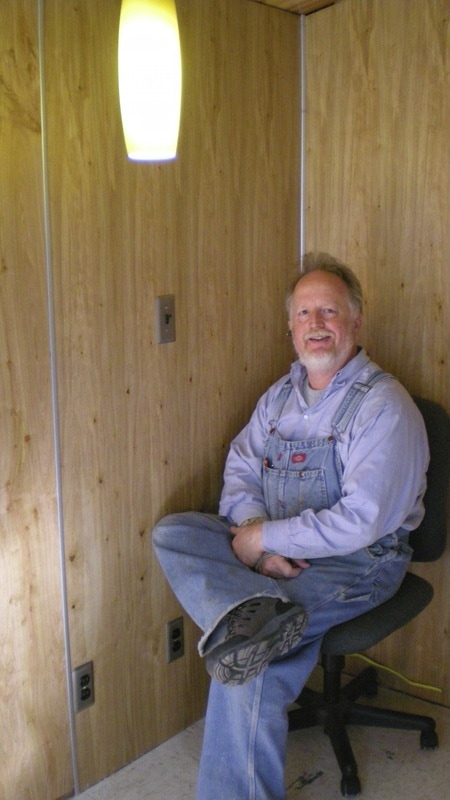
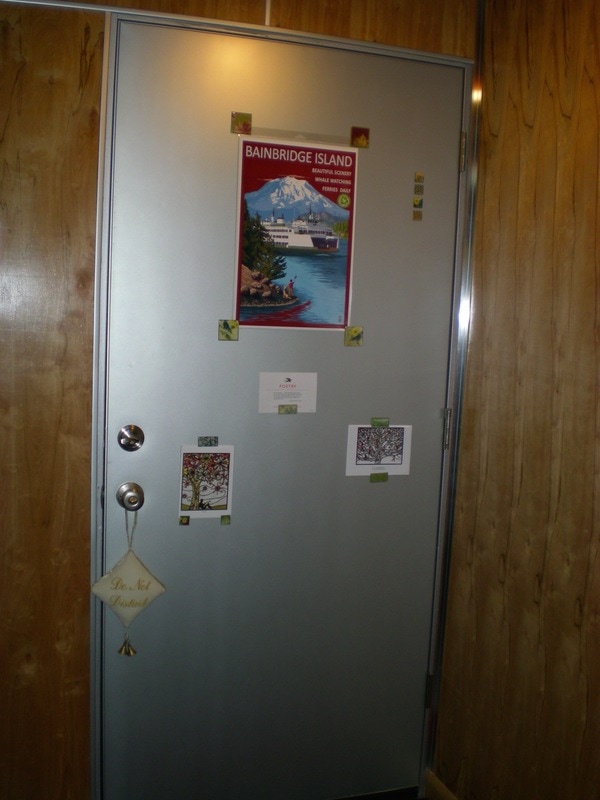
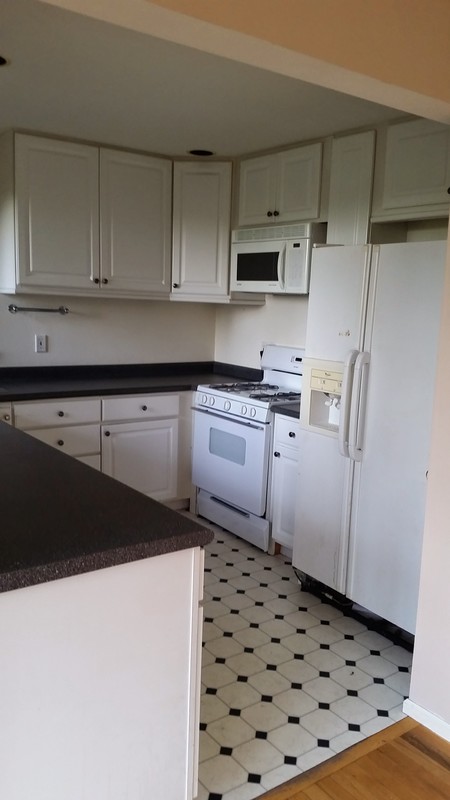
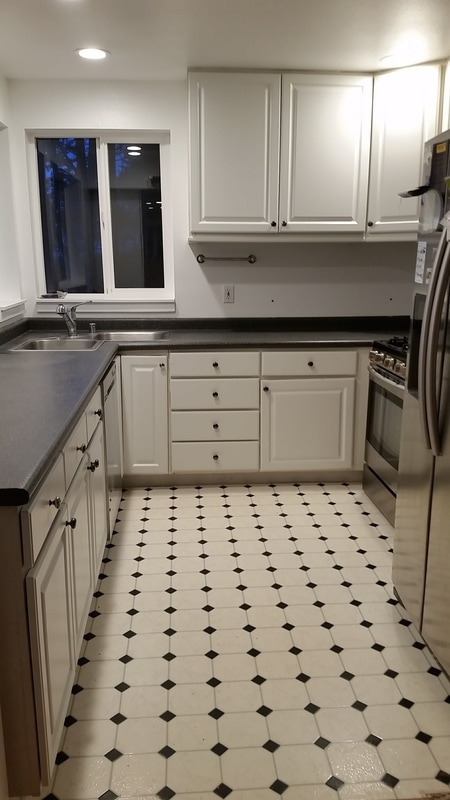
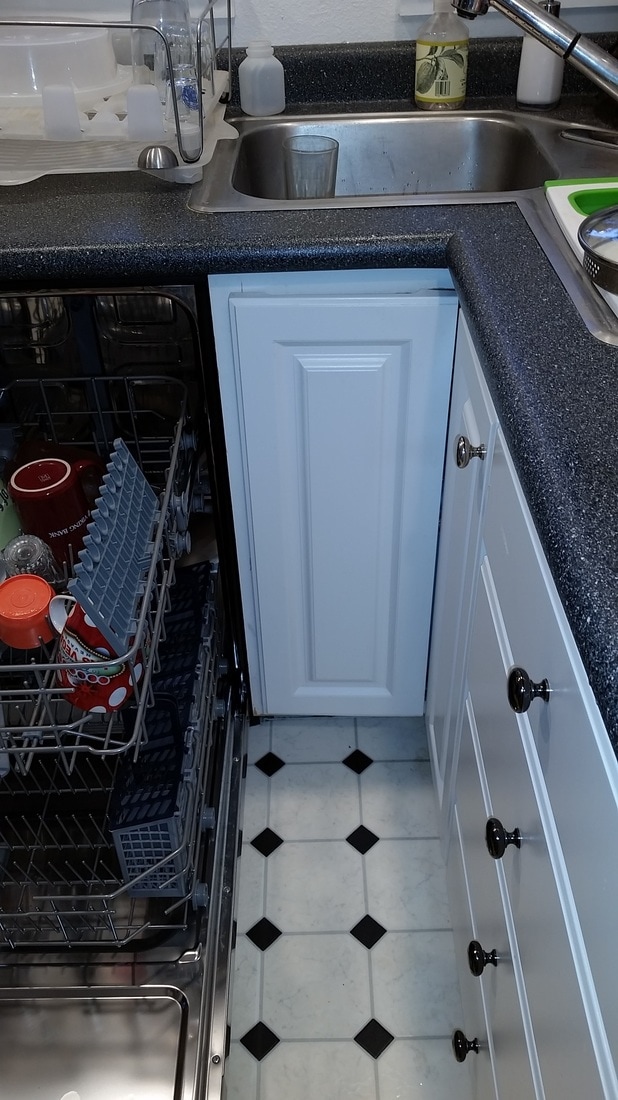
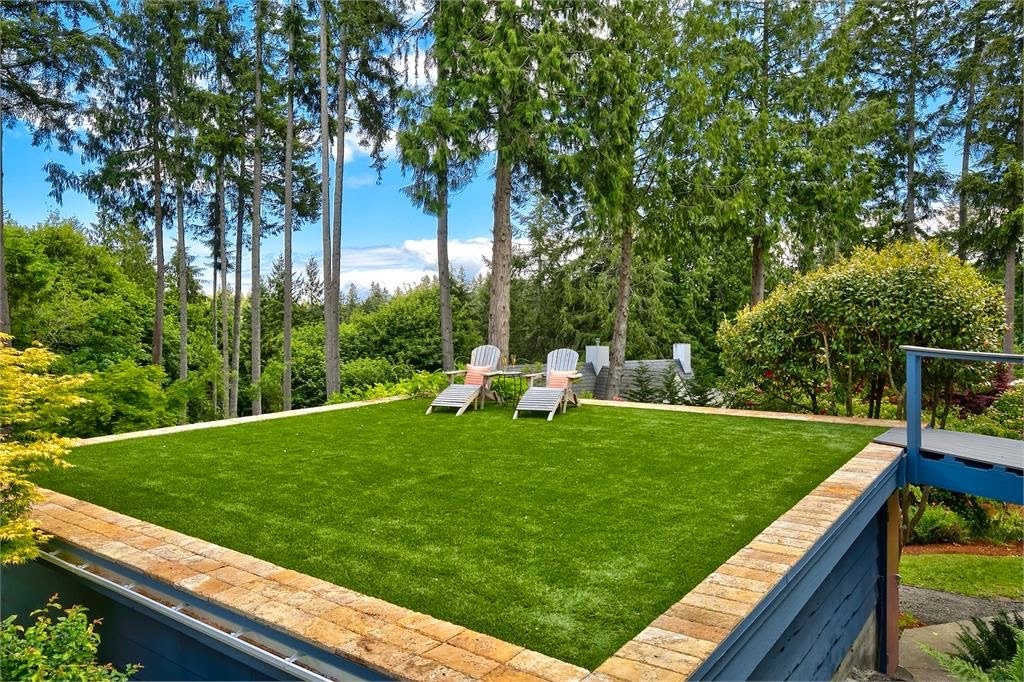 ROOFTOP TURF When my husband and I converted an old garage into a studio apartment five years ago, one priority was to connect the studio to the landscape, which in this case, was a garden filled with Japanese maples, rhododendrons, and all sorts of perennials which were right outside the windows, as well as a filtered views of Puget Sound and the Olympic Mountains visible just over our neighborhood rooftops. We swapped some windows for a sliding door and built a small deck to provide direct garden access, . 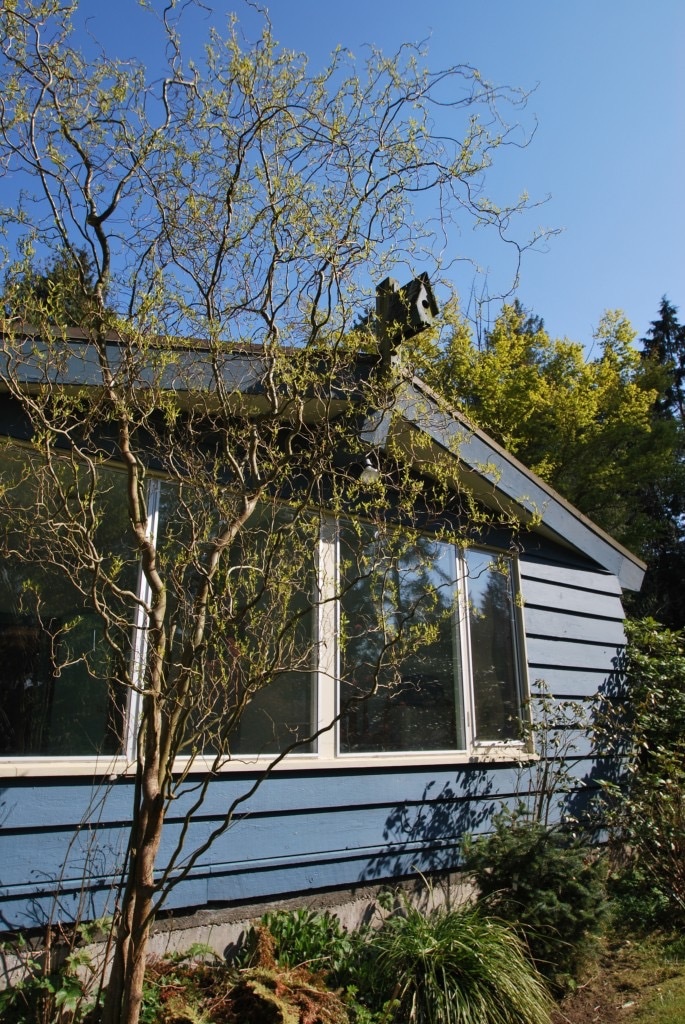 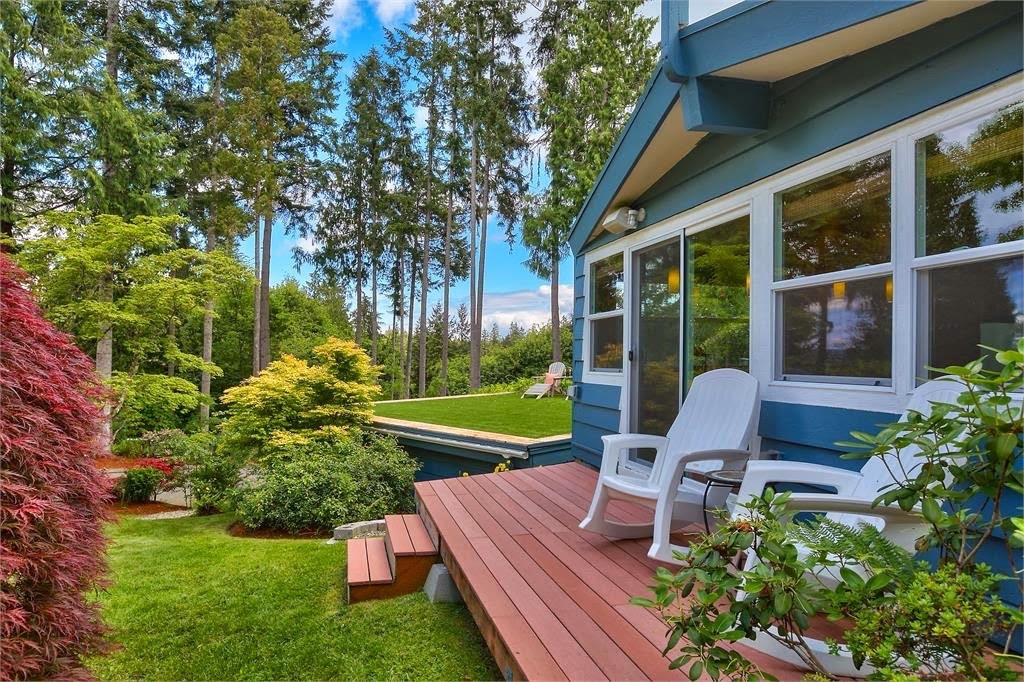 relocated another window along the bed/desk wall to provide privacy by eliminating the ability to see into the house. The only problem with the window relocation on the bed/desk wall was that the new window, which was just above the desk, looked onto the roof of the new garage—which had been a two-walled carport until we enclosed it. I’ve stayed in plenty of hotels with great city views from the upper floors, but all too often, they also incorporate the ugly flat expanses of neighboring roofs. How could we spruce up the roof, which currently leaked and was covered with a tarp?  We thought about painting a mural, about adding planter boxes, after we fixed it, but it would still look like a roof. And then my husband came up with an idea: grass. We didn’t want seed or sod, that would need to be watered and mowed and would brown down in the height of winter and summer. What about artificial turf—Astroturf—we called it decades ago? It would always look green, but it wouldn’t look real up close. But nobody sees a roof up close, right? This roof was not only outside the writers’ retreat; it was also just feet from our dining room, which had a sliding door that led to a deck that was only a few feet wide. Why couldn’t we use the roof as part of our yard? My husband, brilliant again, looked at the short span between the existing deck and garage and decided to build a bridge, so we could enjoy the water and mountain views from the garage roof—which really was the best vantage point. Kevin located Synthetic Turf Northwest, a company that installs real looking artificial turf—blades of varying heights with some browned down short grass near the “dirt”—on playfields, golf courses, and private homes. We were their first rooftop installation. We cleaned the old roof, put on self-adhesive ice and water shield rolled roofing, and then the installers rolled out the turf, sprinkling sand to weight it down. The result was a lawn that looked great year round from the studio window, and that was soft underfoot and cooler than wood decking in the summer heat. 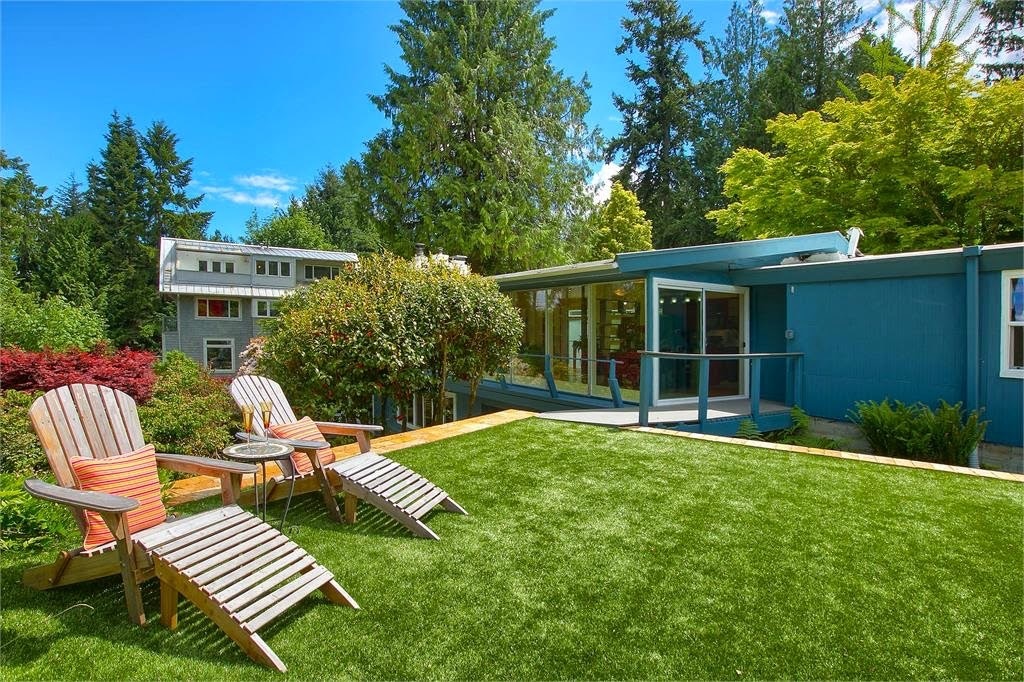 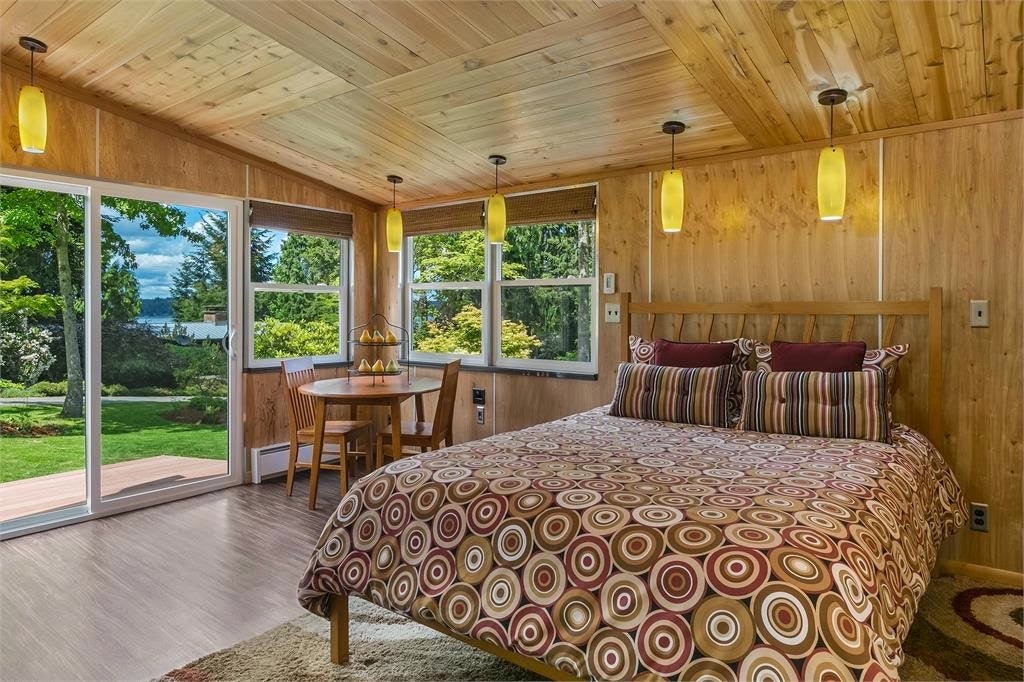 UNDERLAYMENT AND CEDAR FENCING Five years ago this month my husband and I began finishing the interior walls of a writers’ retreat, a studio apartment that had once been a two-car garage. The former garage had been converted to living space in the late 1950s by enclosing the small breezeway that had initially separated the house and garage, and by adding a small bathroom and laundry area. With dingy green walls and green linoleum floors, it looked as though it hadn’t been touched since. The house was one of noted Seattle Architect Ira E. Cummings’ early designs, and we were only the third owners in its 60-year history. In updating the house and designing the apartment we wanted to stay true to the original aesthetic of mid-century modern design that favors open spaces and incorporates wood, metal, and laminate— inexpensive materials of the time. The studio seemed the perfect space to use those materials instead of traditional sheetrock on the walls and ceiling. My husband and I prowled the aisles at Home Depot, dismissing wainscoting, bead-board, and paneling, not finding anything I liked. Then I remembered visiting Bainbridge Island’s Islandwood a few months prior, and described to my husband what I’d seen on the walls. It was Oriented Strand Board—looking like compressed straw—the sheets we saw were stamped repeatedly with the manufacturer’s name; Islandwood’s were sans stamps.  We continued investigating the lumber aisles and came upon a sheet of underlayment that was stacked wrong side up. Instead of being dyed solid orange, the grainy skeletons of trees, their limbs and knots made interesting patterns across the panels; shapes that brought to mind birds and mountains. I thought it would be perfect for our walls, though I didn’t know anything about construction then. Kevin and I had to handpick each panel to make sure the underside wasn’t damaged and didn’t have orange showing through. Then, he had to figure out an attractive way to trim between the boards; we couldn’t have them just butt up next to each other. He used aluminum strips usually used on floors, which added definition to the walls. To accentuate the use of metal as an accent, we installed metal plug and plate covers, and a metal entry door (perfect for poetry magnets). I loved the look of cedar planks for the ceiling, but the costs were prohibitive, until Kevin suggested buying much less expensive and shorter 6-foot fence boards and “ripping them down” to a smooth finish. I agreed and had my first satisfying stint at a planer and then I sealed the boards with water-based polyurethane. Instead of running the finished boards in long rows, Kevin decided to take advantage of their unique length and designed a series of alternating squares across the ceiling that added more visual interest. We had more than 60 bookings for our studio in the year I listed it on Airbnb. Everyone loved the space. We did too!  Cute! was my first thought when I saw the kitchen of the fixer upper we bought. It was casual and fun with a black-and-white vinyl floor, white cabinets, black counters with white speckles. New appliances were all it would need I thought—until I moved in, unpacked, and cooked. In this case, Fun did not mean Functional. The batwing sink—a two-bowled model that sits in an inverted V at a 90-degree angle in the back corner of the kitchen—has caused trouble from the moment it was installed way back when. The bowls are too small to hold a 9-by-13 pan, which must be washed at an angle, which means water splashes out from the sink onto the counter, which was not caulked where it meets the laminate countertops, so there’s often standing water inside the sink cabinet. From years of water rolling where it shouldn’t, the door to the sink cabinet itself has swollen nearly an inch at the top and doesn’t close completely.  Batwing corner sink and water damaged cabinet To compound trouble, the dishwasher is installed directly next to the sink cabinet, which means that when the door of the dishwasher is open, I have a space of 10 inches to stand while moving items from sink to washer. Now, I’m not a huge person and I’m relatively flexible, so I am able to twist sideways to load the dishes, albeit awkwardly, with more water dripping on the counters and floor. But then, last winter I pulled muscles in my back and contortions were out of the question. So, for months I had to back away from the sink completely, holding my wet dishes, and crouch over the front of the open dishwasher door so I could load straight on. It was a pain that saved me from more pain, though it was extremely impractical. In fact, the design is doubly impractical: the lower level apartment has a nearly identical kitchen with the dishwasher immediately adjacent to the right sink rather than left as it is in the main level of the house. Both the kitchens were built as part of an addition sometime in the 1990s, so someone took the time to plan the layout— without really thinking about the practicality of the choices. 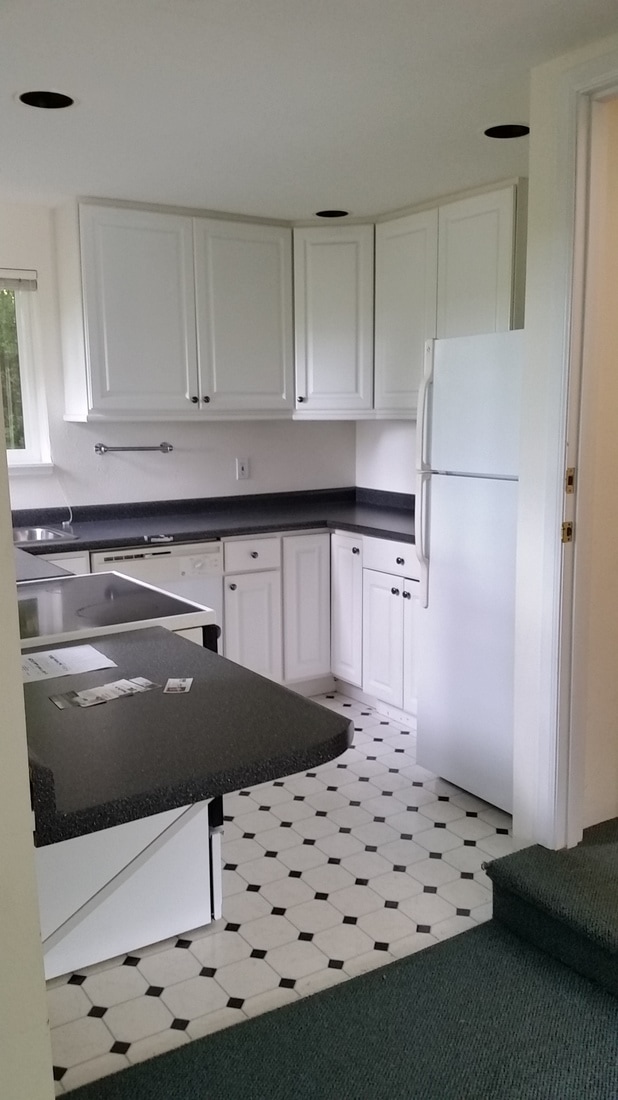 lower level kitchen Until recently, I wouldn’t have considered myself a professional builder, but I have decades of experience living in homes, carrying out all the tasks one expects to be done conveniently in rooms designated for those tasks, like cooking and laundry. Many aspects of homebuilding and remodeling are regulated and routinely updated to keep us safe in our homes: structural, plumbing, and electrical codes, for example. Design, though, is often a preference—recessed lights or pendants, wood floors or carpet—but there are design principles we treat as rules, tried and true elements that just make good sense, like the kitchen “work triangle” I learned about in seventh grade homemaking! Had the original designers of my kitchens sought competent advice, we could’ve gone with new countertops, appliances, and paint to freshen our kitchen. But with the tiny corner sinks, ruined cabinets, and nowhere to stand, we’ve had to gut and start over—and we’re being thoughtful about the design, opting for a galley kitchen to rid ourselves of the corner sink trouble. 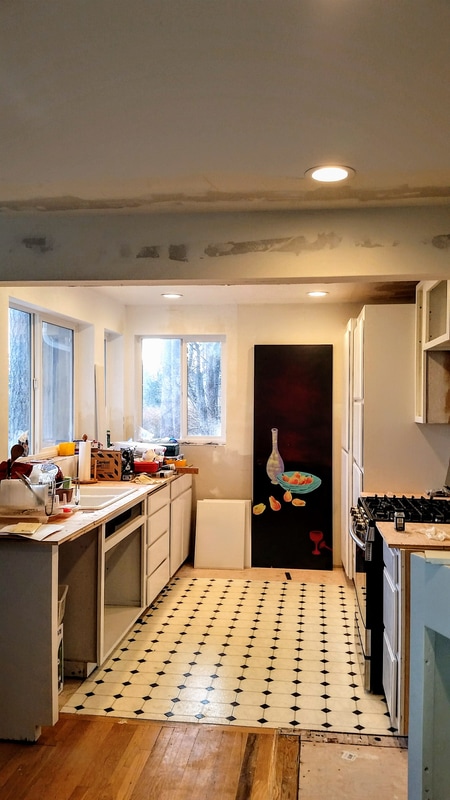 kitchen remodel underway In this age of instant information, a quick Google search can take us to sites like Houzz for articles and opinions about configuration and finishes. Another great resource is The National Kitchen and Bath Association (NKBA), which has developed guidelines for placement of kitchen appliances, sinks, counter work areas, cabinet and counter space, lighting and more. I found them on Kitchens.com.
Of course we might not always be able to meet every guideline, given the layout of our homes, and our budgets, but it’s good to have those minimum numbers in mind when you’re planning to remodel, or before you go house hunting. The NKBA’s recommended minimum space between a corner sink and the dishwasher is 21 inches. My kitchens have 10! That means there should’ve been a 12-inch cabinet between the sink cabinet and dishwasher. No wonder cute didn’t cut it. |
Cathy WarnerWriter, Renovator, Realtor Archives
January 2020
Categories |


 RSS Feed

|
|
|
Contact
|
Telephone360-600-6041
|
|