|
A couple I know and love bought their first home today, and I had the privilege of serving as their real estate broker.
Escrow was set to close tomorrow, so when I picked up the voicemail from the title company this afternoon, I worried it might be a last minute delay. Instead, a chirpy voice told me the transaction was recorded and complete. And what did I do, upon receiving the news? I cried. And then? Then I wrote about it on my author website where you can read the rest of the story..
1 Comment
How long have you been cleaning windows? For me, it's been over 30 years. That's a long time for both windows and techniques to change. The first home my husband and I owned was a cabin in the Santa Cruz Mountains. Our single pane aluminum windows sweated all winter long as the wood stove heated the house, and the temps dropped each night. Come spring, I had to clean mildew from the pitted tracks and painted sills, and nothing short of X-14 worked. It was a fume filled job that I dreaded. I couldn't remove the screens myself, or reach the exteriors, so our view was often blurry. Since then, our homes have been constructed with double-paned vinyl windows that stay much drier inside. Even so, cleaning up in a construction or remodel zone presents its challenges. Dust and sawdust collect on screens, and in every nook and cranny of a window. The windows in fixer-uppers I've purchased in the past 5 years—particularly estate sales and bank owned homes that haven't been maintained well —sport an accumulation of dirt and debris in their tracks as well. Spraying cleaner on the panes—whether you go the natural route with vinegar and newspaper, or use a commercial product—and rinsing the screens aren't nearly enough in situations like these. Thankfully modern windows allow a level of disassembly that allows for deep cleaning--great news for those, who like me, are disgusted by the idea of all that dirt piled up inside the house! Some tips and tricks: –Screen pull tabs are meant to be mounted on the inside, allowing one to remove the screen inside the house. You can rinse them in the shower, especially if your shower head has a hose, and dry with a clean microfiber cloth; or wipe them with a damp microfiber cloth, or place them outside in a driveway or on a deck and spray with a hose and allow to air dry on warm day. Be sure the frame is dry before remounting. –The opening window itself can be lifted in and out between the mounts on the top of the window. This allows you to clean both sides of the moving pane. For the fixed pane, try standing on a step stool or ladder to clean the exterior from the inside. If that doesn't work, use a ladder outside. Larger windows can be heavy, so recruit some help lifting the window in and out of place. –The sliding track at the bottom of the window can often be removed with a pair of needle nosed pliers, or pried up with a kitchen knife--just look to see how the ridges are spaced before removal so you can push it (and push hard) back in facing the proper direction. –Use a wet Q-tip to remove mud/dirt from the corners of tracks. Clean microfiber towels do an amazing job leaving windows streak free. Try using brand new ones if you're preparing your windows for photos prior to listing your home for sale. I know it's not natural, but Costco's SprayWay cleaner, simply can't be beat for leaving windows incredibly clear--something that matters a lot for real estate listing photos. –Those tiny flecks of paint (called overspray) and dried up bugs that window cleaner won't remove? They'll pop right off with a straight edge razor blade. Be careful to slide the blade in a short straight stroke (don't rub back and forth) so you don't scratch the window. Check out the slideshow below for visual explanations. Happy cleaning and enjoy your clear view. We were hired to help get a house ready for sale. The elderly owner died, and his daughter did the hard work of cleaning out years of gathered possessions. Then she painted the interior walls and kitchen cabinets white, and hired someone to replace most of the flooring with new wood-look laminate. With the clean white look, the age of the tile—pink on the master bath vanity counter and back splash, pink around the master tub, pink laminate counter in the second bathroom, pink kitchen backsplash, tired beige kitchen laminate counters, and pink toilets—really showed. The construction was good quality, definitely not a fixer upper, but it still needed a boost out of the 1960's colors to list at its best.. We came in and replaced the toilets with new white low flow models, bought new faucets for all the sinks, deep cleaned years of soap scum out of the showers and tub and polished them. We hired a company to spray epoxy paint on the master tub tiles (something we'll do ourselves next time, since Matthew and Michael on crew are great painters), and then used Giani stone paint systems to give a marble-like appearance on all the countertops, both tile and laminate. It was a multi-step process that took several days. The paint kits are reasonably priced, and even paying our labor costs, the price was thousands less than replacing the counters with new tile or stone, and eve less than installing new laminate. The house is going on the market soon, and the listing broker called the results wonderful, and a "no brainer" financially in terms of making the house much more marketable. We're glad to have our research into new refinishing techniques produce such nice effects. We'll definitely use this method again for an inexpensive update. See for yourself: Here's a slideshow of before and after. 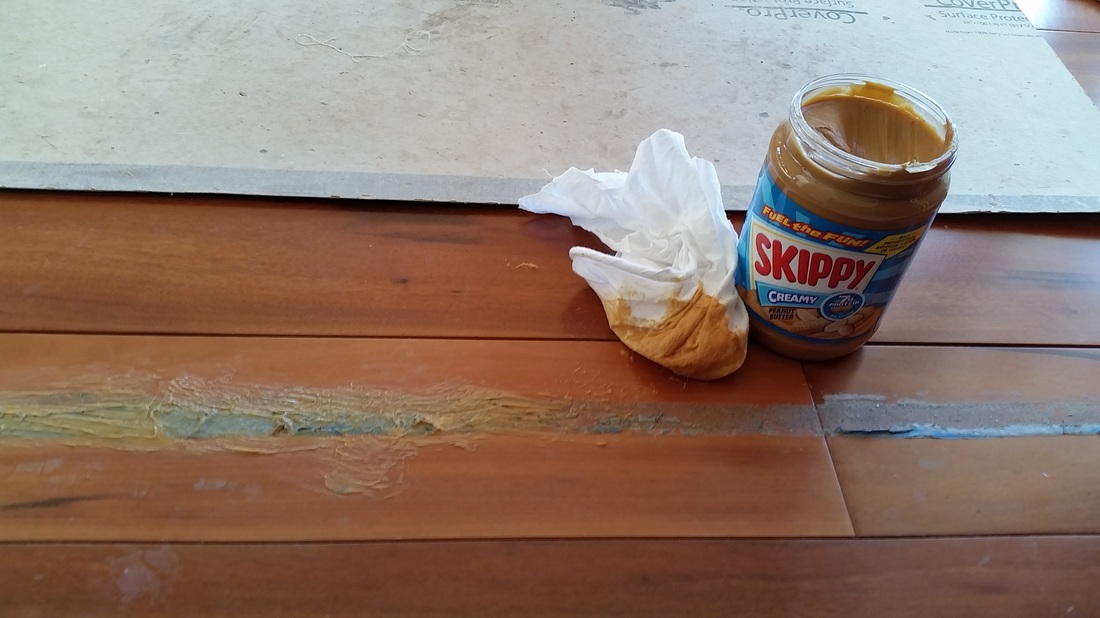 Building or remodeling a house means removing labels from windows and bathtubs. A sharp razor blade and glass cleaner work wonders on windows, but they could scratch acrylic or gel-coated fiberglass tubs, so I employ my fingernails and Soft Scrub, and usually end up with a large patch of smudge gray adhesive. Until now, the solution for that mess has been my reluctant and conservative use Goof Off or Goo Gone. The chemical cleaners are effective, but breathing their vapors is no fun—think migraine. Recently I was confronted with the task of removing duct tape that had been used to fasten protective Ram Board over hardwood floors, and had remained in place for years. Duct tape is incredibly sticky—and it should be to keep our heating ducts fastened together without air leaks—but it doesn’t belong on floors where the weight of foot traffic added to the adhering power of the fibrous tape. The offending tape was found throughout the large room where pieces of Ram Board were taped together, at the edges of the room, and at the transitions to the kitchen, stairs, and powder room. I balked at the thought of using volatile chemicals for hours while I scrubbed off the gummy residue, poisoning four of the six of us working in the house at the time, since we only have two EPA/OSHA approved respirators. So I did what many of us do best: I turned to Google, searching for “natural adhesive removal.” Cooking oil came up, and I thought it might work in pump or spray form, to remove children’s stickers from a refrigerator or entertainment center, and Goodwill price tags on toys and dishes, but I thought it would be too thin and runny for the floor. Then I came across a better suggestion: peanut butter. It had oil’s properties without the drips. I could spread on peanut butter, creamy of course, and let it soften the adhesive without worrying that it would run and drip on the floor. So I bought a jar of Skippy (no need to purchase all-natural or organic for this purpose) with an opening large enough to dip my rag in. For a smaller job at home, you could certainly spoon some creamy peanut butter into a plastic container and use that, rather than contaminating an entire jar with dirt and fibers. I used clean painter’s rags made of T-shirt material, one to apply the peanut butter, another to rub off the adhesive. (I would avoid microfiber towels for this job, as the towel would absorb the peanut butter’s oil rendering it less effective.) I found that circular motions as though I were waxing/polishing a car worked best to remove the adhesive and the gunk that’d stuck to it. I was careful to keep refolding my rags so that I wasn’t rubbing the tape fibers into the wood anymore than necessary. The project involved a fair amount of elbow grease, but what I thought would take a full workday only took a few hours, and the results were great. So, next time you’re confronted with sticky residue you need to remove, reach for the peanut butter. 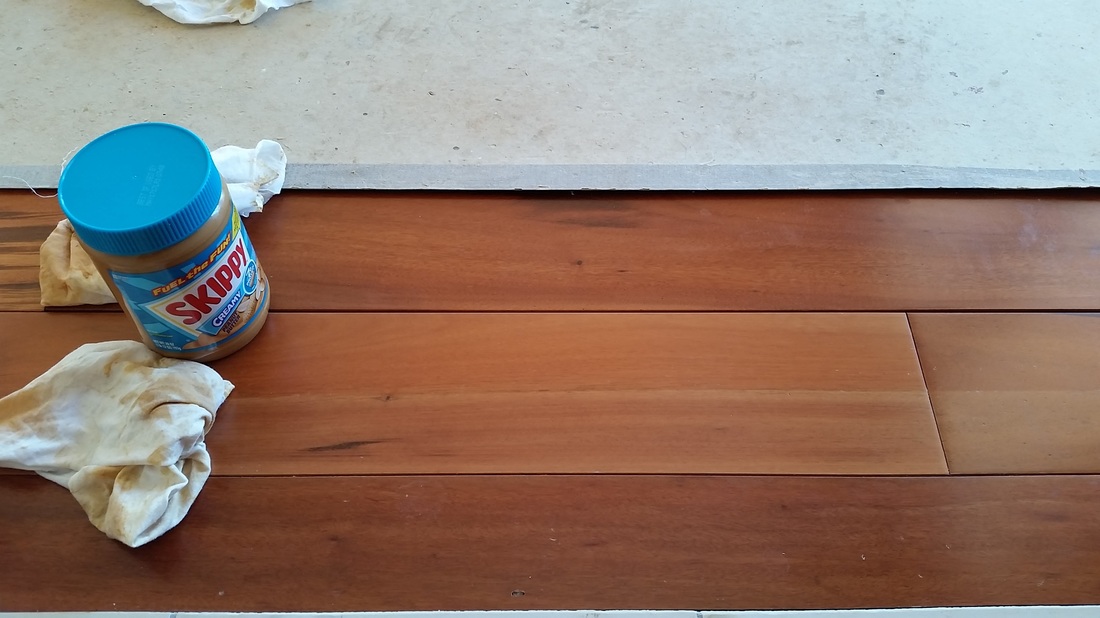 |
Cathy WarnerWriter, Renovator, Realtor Archives
January 2020
Categories |
 RSS Feed

|
|
|
Contact
|
Telephone360-600-6041
|
|